previous page: Downloading, installing and keeping up-to-date Ad-Aware SE
Before you start the actual scan, you must configure Ad-Aware in such way that it can thoroughly search your hard disk(s) for any possible spyware/malware/adware intrusion.
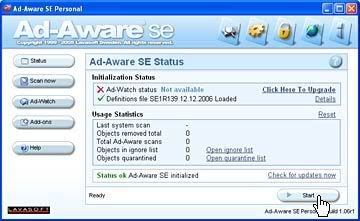
3.1 Click the Start button.
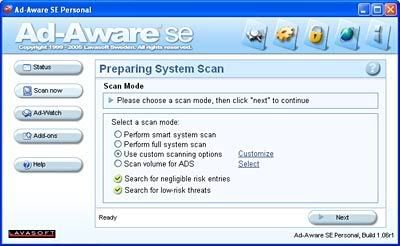
3.2 Ad-Aware is now asking you to select a scan mode. First, make sure that both the search for negligible risk entries and low-risk threats options are checked — see items marked with 1 and 2 in the image below. Select the "use custom scanning" option (see 3 below). Do not click on the Next button yet! Instead, click the Customize option (see 4 below).
3.3 The General Settings window will pop up. Make sure that all three options in the Safety section are checked (see 1 on the image below). Also, the outdated definitions update found under the Definitions section must be checked (see 2).
If you want, you can lower the number of days when Ad-Aware will automatically remind you to check for available updates. 14 days is the default option. The "Write logfiles to" option shows the path to the location where all logs are stored after a scan is performed. Write down this location or change the path to a location on your computer where you will easily find these logs. You never know if you'll need them — in case a severe problem shows up, you may consider retaining these logs so that you can email them to someone that might help you or to post them on web boards and forums where you can get help.
Finally, click the Scanning button (3).
3.4 Select the drives you want to scan for spyware. Select all the hard disks available on your computer (see 1 on the screenshot below), including any removable ones. Floppy and CD drives can be left unchecked — in majority of the cases, these do not get infected with spyware. To make sure that they really don't get infected, you should have an antivirus program installed on your system (this is a must for any computer).
Once you have checked all the locations you want Ad-Aware to scan, click the Proceed button (2).
3.5 Click the Advanced button (see 1). Check the "Move deleted files to Recycle Bin" option under the Shell Integration section (see 2). If you want, you can add the option to scan files with Ad-Aware inside Windows Explorer (the second option in the Shell Integration section). This is rarely needed, as spyware tends to install itself in system folders, which are rarely browsed. When you download files from the Web, your antivirus program will usually notify you of any potential risks, so there is no need to turn on this option.
Check all the three options under the Logfile Detail Level section (see 3). Finally, click on the Defaults button (see 4).
3.6 Remove (delete) both the Default homepage and Default searchpage options (see 1 and 2 on the screenshot below). They should be left blank. Next, click the Tweak button (see 3).
3.7 Expand the Scanning Engine option (1). Do the following:
- Make sure that the first and the fifth options (Unload recognized processes and Scan registry for...) are checked.
- The options which are marked with a cross on a red background in the screenshot below) should be left that way.
- The option that is checked but on agrey background (Ignore spanned files...) is available if you purchase the commercial version of Ad-Aware. Don't worry, Ad-Aware will function perfectly regardless whetheryou are able to tweak this option or not.
Once you are finished with the Scanning Engine settings, expand the Cleaning Engine option (2).
3.8 Under the Cleaning Engine settings, make sure that the options marked with 1, 2, 3 and 4 on the image below are checked. There are cases when Ad-Aware will ask you to reboot your computer to be able to remove some malware which was found during the scanning process. Also, it may require to close Windows Explorer and Internet Explorer to be able to clean your system, because if these two are open, some processes are running and they need to be shut down so that the cleaning operations could be performed. Hence the need to chek all these options.
The greyed-out options and the last option (Disable manual quarantine) should be left as displayed in the screenshot below.
3.9 Expand the Misc Settings option found at the bottom of the options list (1). Leave the Dump details... option unchecked and if you want, check the Play sound... option. The latter will enable Ad-Aware to play a sound if critical objects are reported to be found at the end of the scan. This is optional.
There! You have just made all the needed adjustements for Ad-Aware to run a thorough scan through your Windows system. Click the Proceed button (2).
3.10 You will be presented with the following screen:
Do not click the Next button yet! There are some important things to be made before the scan starts. Please proceed to the next page of this guide by clicking on the link below to see what remains to be done before you can start the actual scanning process.
Next part: How to scan for and clean spyware from your Windows system with Ad-Aware
No comments:
Post a Comment